Creating a Contact
Adding contacts makes is easier to not only send messages, but also track replies. In your inbox, messages received by your contacts will appear with the name of the contact as the sender, as opposed to just the mobile number. You can also add contacts to groups, making it easier to send bulk messages.
Creating Individual Contacts
1) Click on Contacts, then All Contacts, then click New Contact:

2) Input the required information:
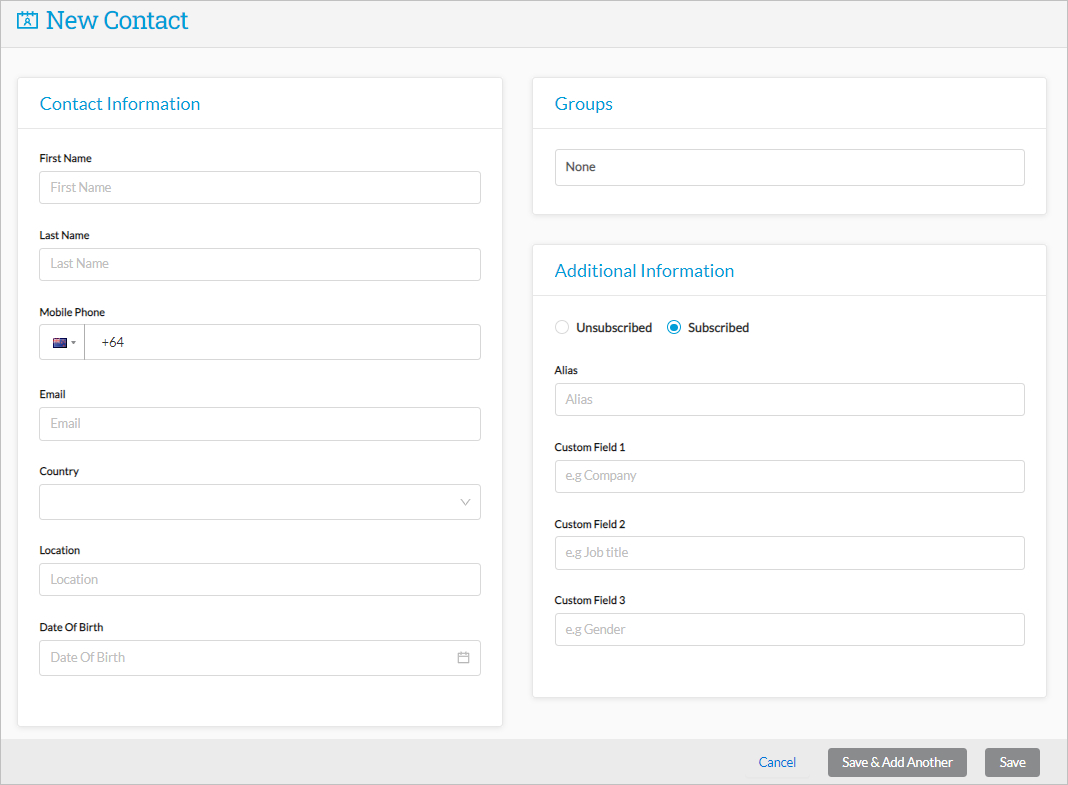
In the left-hand table, the fields available are as follows:
- First Name - the first name of the contact
- Last Name - the surname of the contact
- Mobile Phone (required) - international format required, and the country should default to the associated account's country
- Email - email address of the contact
- Country - country associated with contact
In the right-hand table, additional information can be entered:
- Groups - Select one or more Contact Groups (groups must be created prior to creating the contact)
- Additional Information- Provide additional information (if required):
- Unsubscribed v Subscribed (a contact will be subscribed by default. Selecting Unsubscribed will prevent messages from being sent to this contact)
- Alias - used as an alternative name for your contact, as well as for email to SMS
- Custom fields (x3) - can be used if you have other relevant information on your contact that you wish to record or use in message personalisation
NOTE: You can use the Email and Location fields to store any information you like, as they are free text fields. This means that in essence, you could store up to five fields of custom information to use in message personalisation.
4) Click Save
Your contact will now appear in your "All Contacts" list, and if you added them to a Contact Group, they will appear in the relevant Group as well.
Creating a Contact from the Inbox
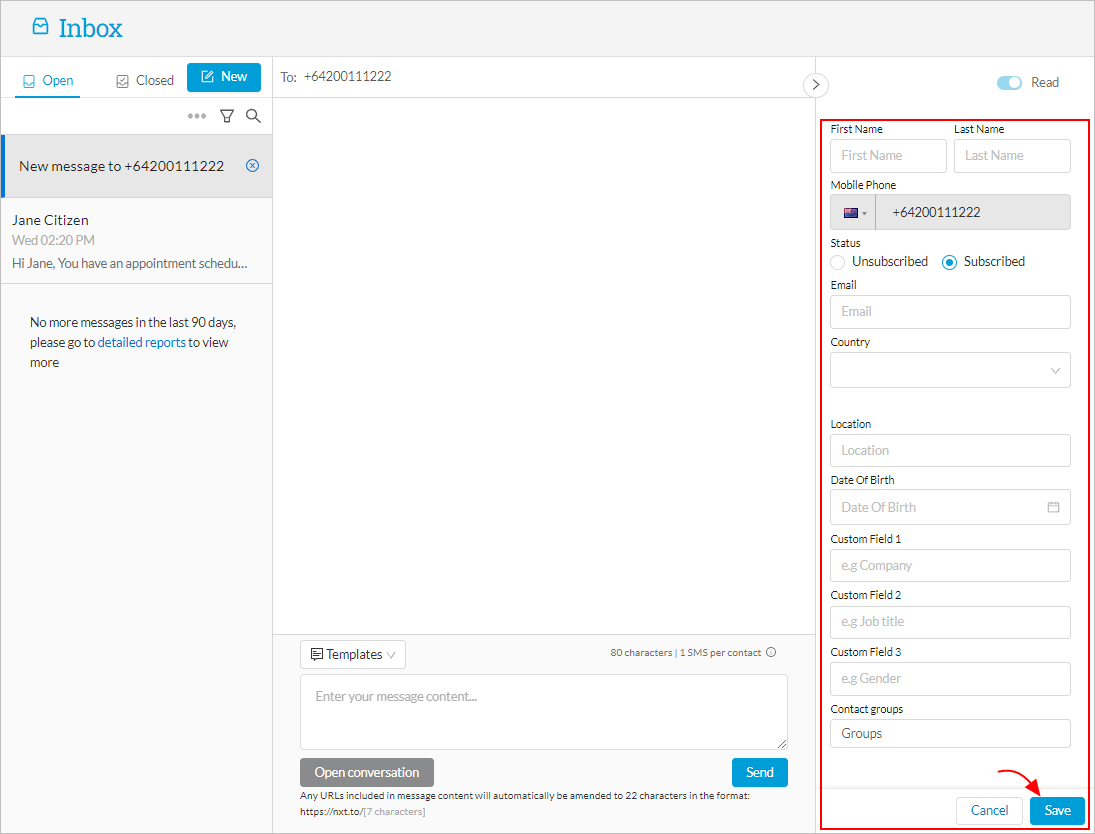
If you are sending to a new number, you can easily add the recipient to your contacts by entering their details (including their subscription status) into the contact panel on the right and clicking Save:
Importing Contacts in Bulk
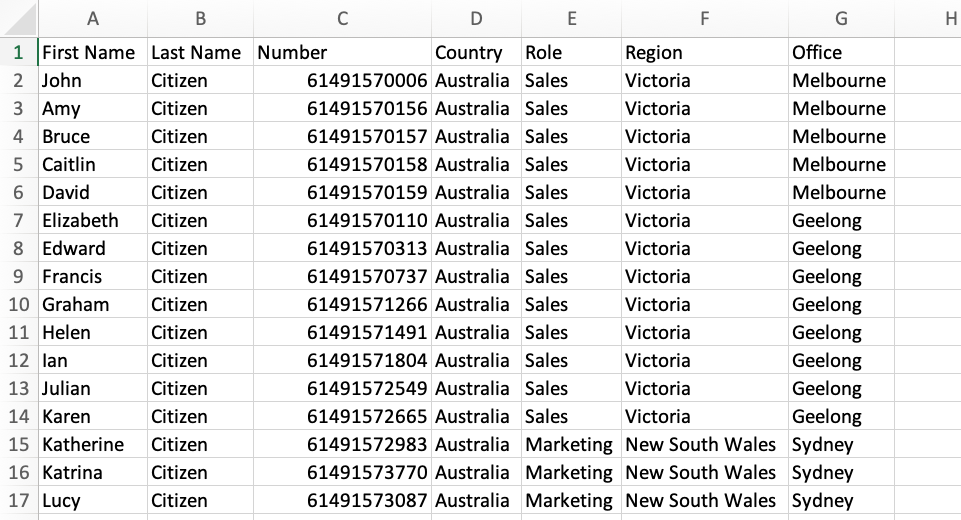
First, you will need to prepare your contact data:
- You will need to ensure your contact list is saved as a .csv or .xls file (the optimal file format is CSV UTF-8, Comma delimited)
- If you do not add the international prefix to your contact numbers, the web portal will assume you are importing numbers local to your preset location in your account settings, and will validate accordingly. This means that international numbers will be rejected without the correct prefix being added
- With local numbers you do not need to add the leading zero to the number to successfully import (e.g. if your spreadsheet cells are formatted as "numbers" then a phone number may appear as "412345678" as opposed to "0412345678" - both formats will be accepted for import)
- You can include additional data to your contact list which can then be mapped to the custom fields of each contact profile
The Import Contacts option appears in both Contacts > All Contacts and Contacts > Contact Groups.
1. Click on Import contacts at the top right of the page:

2. Upload your data file to the web portal using either the Browse function or Drag & Drop your file straight into the upload window:
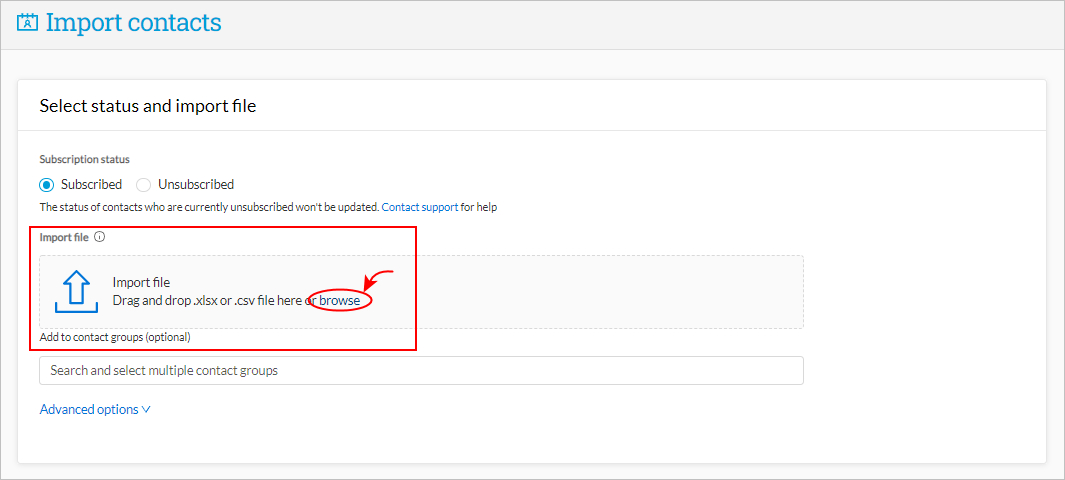
- You can select which pre-existing groups to which you would like all contacts imported in the bottom field under "Add to contact groups (optional)"
- You have the option of unsubscribing all of the contacts in the upload (e.g. if you are bulk uploading blacklists from other systems)
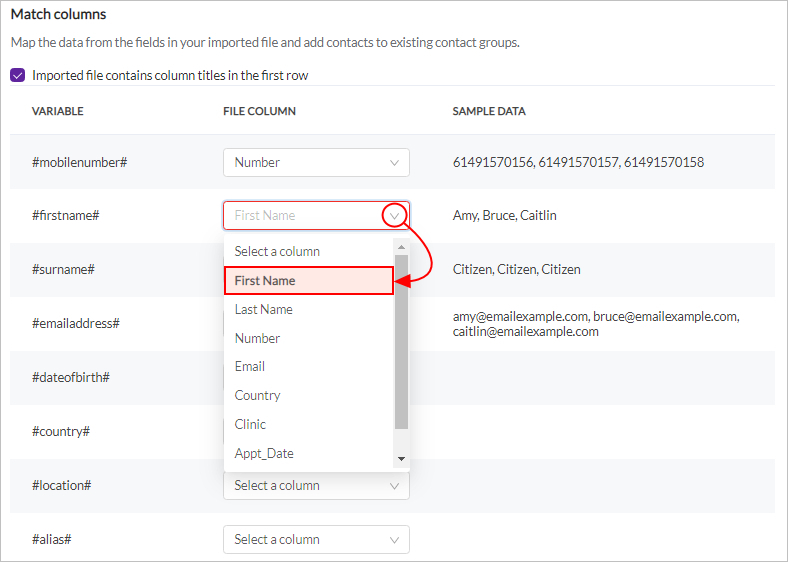
3. Match the columns in your data file to the various fields in the contact profile:
- The system will attempt to auto-detect the mobile phone numbers from your spreadsheet; however, if the data that is pulled into the #mobilenumber# field is incorrect, you can change it to the correct column.
- After you have selected a column to match to a field you will see some sample data from the original spreadsheet
If your contact database includes additional information (e.g. in the example shown we have fields such as "Division", "Role" and "Office"), then these can be mapped to the Custom Fields in the contact profile:
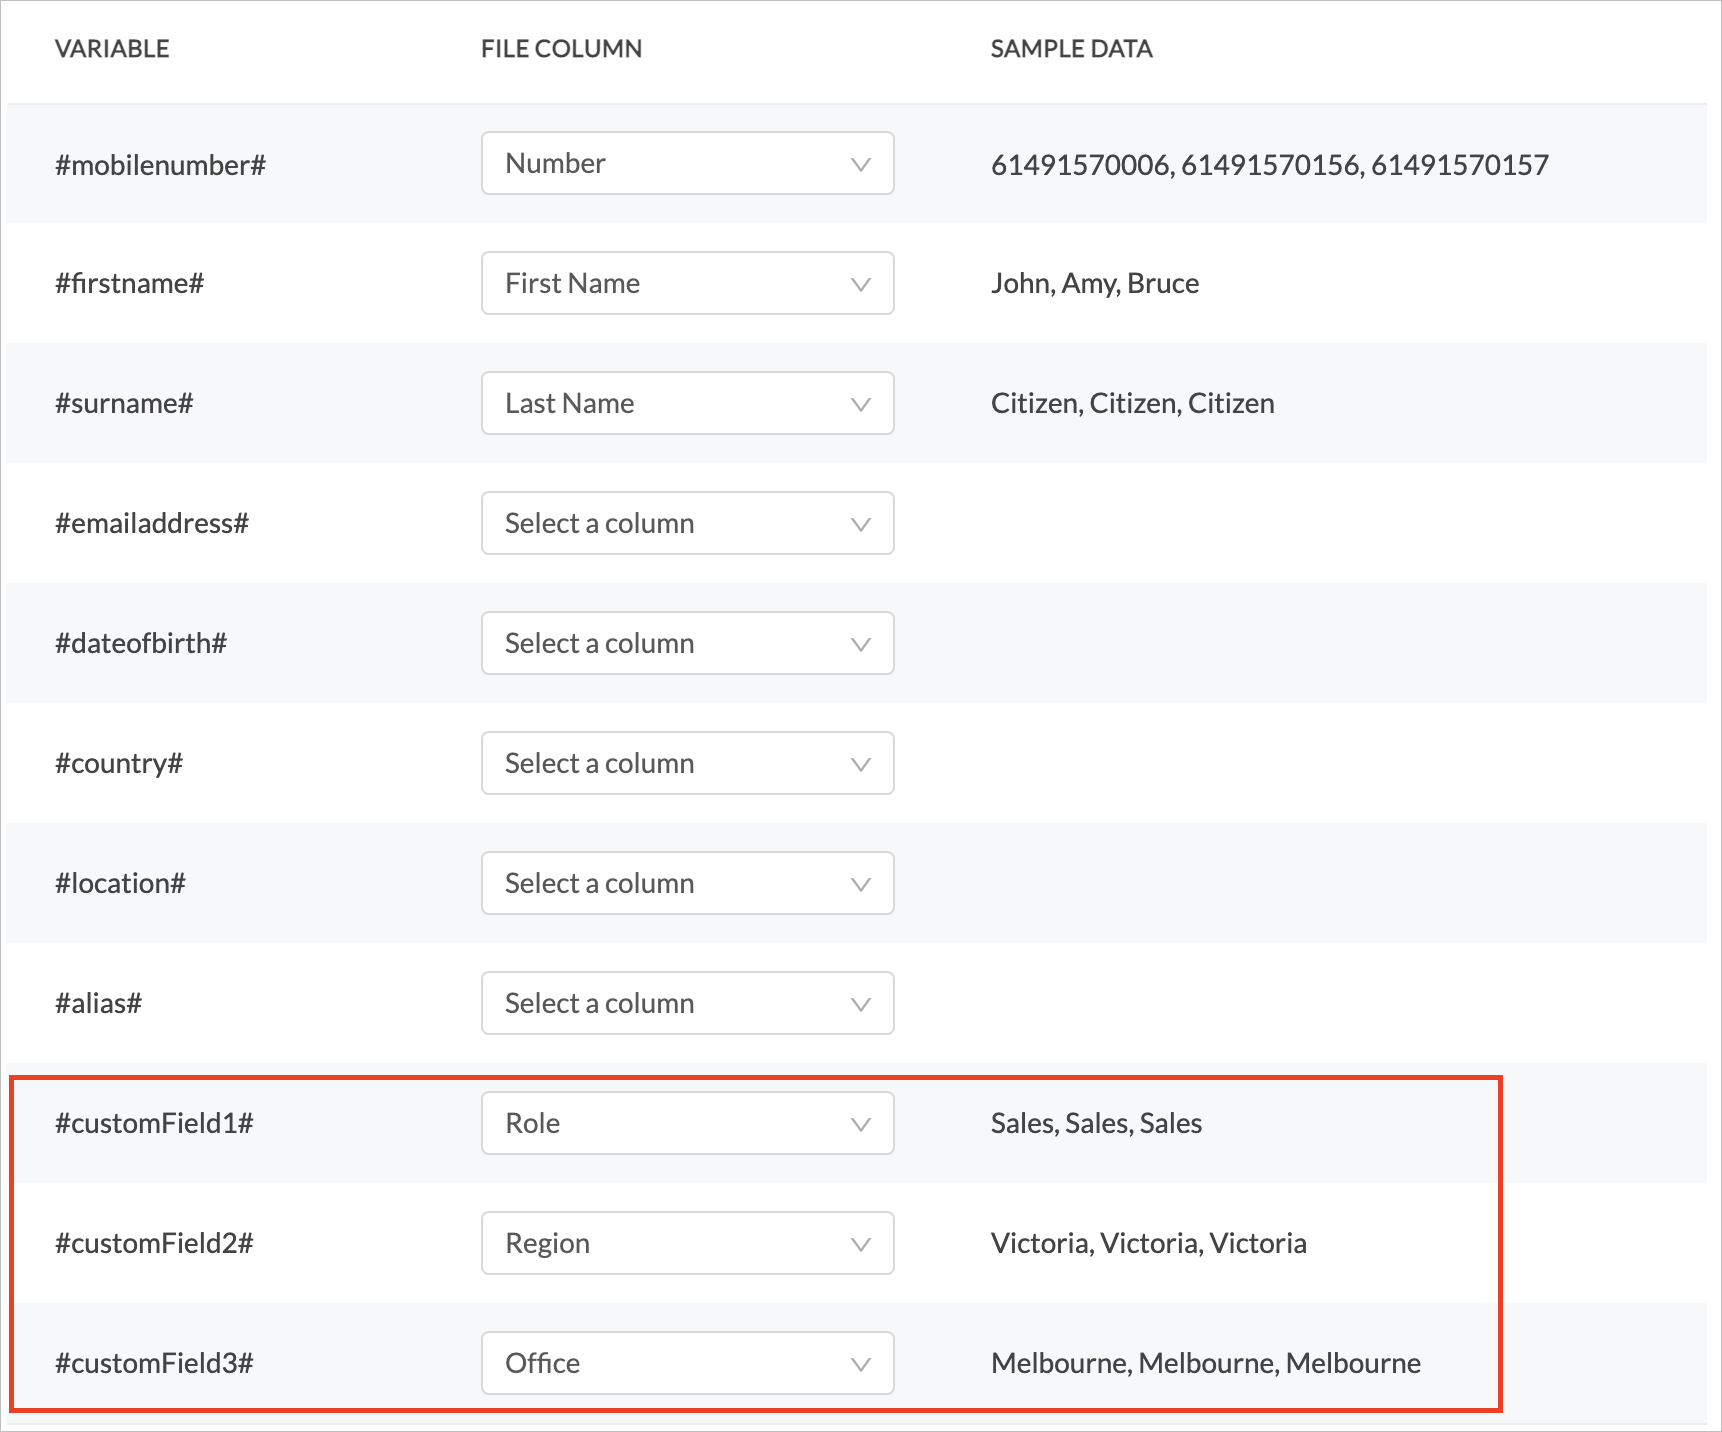
Note - you can also assign your contacts to existing groups by typing the name(s) of the group(s) in the field at the bottom of the screen:

Once you have aligned your data correctly, click Import in the bottom right of the screen to complete the action.
Reviewing Import Results
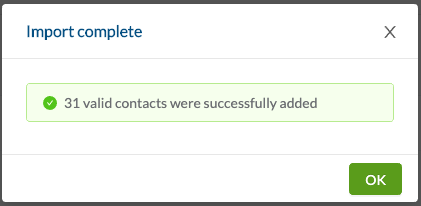
You will then be shown a result of the import in the middle of the screen, along with links for review of successful and failed imports:
